
Vaio stuck on loading screen after upgrading to Windows 10

My Sony Vaio laptop model : VPCCA16FB with originally using Windows 7 operating system, then now I already upgraded it to Windows 10.


All drivers are already installed for each device, everything is OK with this Windows 10 OS. The only problem is:  when I switch the laptop on or restarting it, after vaio logo appears then it stuck with blank screen and it takes about 2 minutes. After that, then it continues to loading Windows.

After I googling about the problem, I am not only the one, other people also have the similar problem with their laptops.

The cause is in the Ultra Low Power State (ULPS) system.
ULPS is a feature or mode in hardware (graphics card) designed to save power by reducing energy consumption to very low levels.

Now the problem is solved. If you have the same or similar problem, maybe this below step will help you too.


To solve the problem :

1. Make sure all devices already have the right driver.

2. Open Registry Editor (Press Windows+R  then write regedit then hit Enter or click OK).
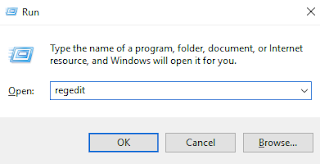


3. After Registry Editor appears, then find  key/dword EnableUlps , by right click at HKEY_LOCAL_MACHINE, then choose Find.. 


use key word:  EnableUlps then click Find


It will take a while for searching..
4. After you see dword EnableUlps, double click on it
5. Change the value from 1 to 0


6. Press F3 for find next EnableUpls.
7. Repeat step 4 and step 5.
8. Press F3 Again until there is no result.

Comments

Popular posts from this blog

How to Enable Hyper Terminal In Windows 7

Hyperterminal Windows 7. Windows 7 Hyperterminal. Hyper terminal is used for data communication via serial port com or TCP/IP Winsock. Unfortunately on Windows 7, Windows 8 and Windows 10 we can't see anymore, even though many of us who still need it, and it is not the solution if we have to go back to Windows XP. The solution :

How to Record Audio Directly to USB Flashdisk on Ashley Remix-802 Mixer

The Ashley Remix-802 mixer is an audio mixer that features direct recording to USB. However, the recording process might not be immediately intuitive since there isn't a clear "record" button. Here are the steps to record audio directly to USB on the Ashley Remix-802 mixer: Recording Steps:  1. Format the Flash Drive: Format your flash drive with the FAT32 file system using a laptop or computer. 2. Add an MP3 File: Insert at least one MP3 file into the flash drive. This is necessary for the mixer to read the flash drive and enable the recording process. 3. Plug in the Flash Drive: Plug the flash drive into the USB port on the Ashley Remix-802 mixer. If the flash drive is recognized, the mixer will start playing the MP3 file, and the display will show that music is playing. 4. Start Recording: Press and hold the Play/Pause button for a few seconds until the display shows "rec." This indicates that the recording process has started. 5. Stop Recording: To stop the ...