IMAP, Internet Message Access Protocol, is protocol for e-mail retrieval.
Gmail offer this protocol to all Gmail users free of charge, so they can use email client such as Microsoft Outlook or Thunderbird to access, send or receive their Gmail.
Server for Incoming Mail : IMAP - Requires SSL
imap.gmail.com
Port : 993
Requires SSL :Yes
Server Outgoing Mail : SMTP - Requires TLS
smtp.gmail.com
Port: 465 or 587
Requires SSL : Yes
Requires authentication : Yes
Use same settings as incoming mail server
To Set Gmail IMAP in Outlook 2010
First, Enable IMAP Access in your Gmail :
• Sign-in to your Gmail
• Choose Setting
• Choose Forwarding and POP/IMAP Tab
• At IMAP Access, Select Enable IMAP, then click Save Changes

• Sign-out from Gmail.
Setting IMAP Gmail in Microsoft Outlook 2010
• Now open the Outlook 2010
• From File tab, go to Account Setting
• Click New, choose Add New Account,
• Select Manually configure server settings or additional server types, click Next
• Select Internet E-mail, click Next
• See figure sample for next steps :


If you have already set all necessaries, you can test by clicking Test Account Settings or you can click Next, the system will verify the setting and you can use immediately your Gmail Outlook when finished.
If problem happen it will notify you the error message, usually will get error like you have entered incorrect password, you try to reenter the password but still don't work.

To solve this problem you have to set the security in your Gmail security setting. Login to Gmail using Internet Browser, go to Security settings, then enable the lesssecurity option. You can use thiss address https://www.google.com/settings/security/lesssecureapps
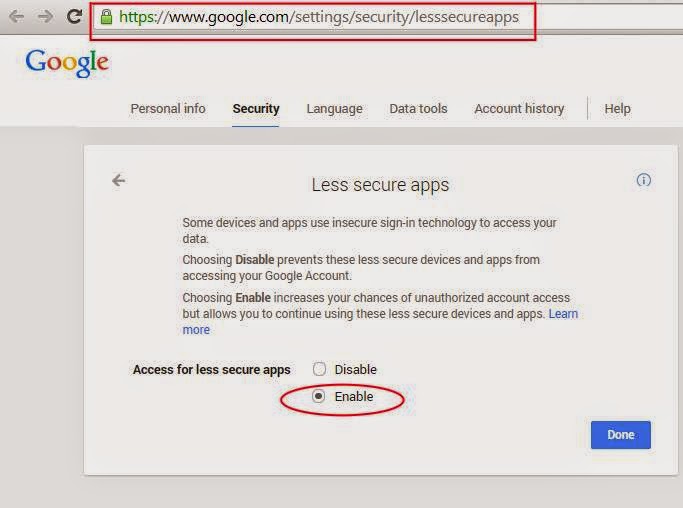
After you enable the Access for less secure apps, click Done, and go back to Outlook setting.
Gmail offer this protocol to all Gmail users free of charge, so they can use email client such as Microsoft Outlook or Thunderbird to access, send or receive their Gmail.
Server for Incoming Mail : IMAP - Requires SSL
imap.gmail.com
Port : 993
Requires SSL :Yes
Server Outgoing Mail : SMTP - Requires TLS
smtp.gmail.com
Port: 465 or 587
Requires SSL : Yes
Requires authentication : Yes
Use same settings as incoming mail server
To Set Gmail IMAP in Outlook 2010
First, Enable IMAP Access in your Gmail :
• Sign-in to your Gmail
• Choose Setting
• Choose Forwarding and POP/IMAP Tab
• At IMAP Access, Select Enable IMAP, then click Save Changes

• Sign-out from Gmail.
Setting IMAP Gmail in Microsoft Outlook 2010
• Now open the Outlook 2010
• From File tab, go to Account Setting
• Click New, choose Add New Account,
• Select Manually configure server settings or additional server types, click Next
• Select Internet E-mail, click Next
• See figure sample for next steps :


If you have already set all necessaries, you can test by clicking Test Account Settings or you can click Next, the system will verify the setting and you can use immediately your Gmail Outlook when finished.
If problem happen it will notify you the error message, usually will get error like you have entered incorrect password, you try to reenter the password but still don't work.
To solve this problem you have to set the security in your Gmail security setting. Login to Gmail using Internet Browser, go to Security settings, then enable the lesssecurity option. You can use thiss address https://www.google.com/settings/security/lesssecureapps
After you enable the Access for less secure apps, click Done, and go back to Outlook setting.