Remote desktop Windows (RDP) using Ubuntu.
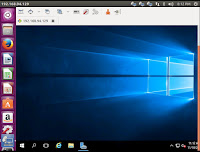
In this example I use Ubuntu 16.04 LTS.
One of the applications for Remote desktop Windows is Remmina Remote Desktop Client App.
By default, this remote App is already installed in Ubuntu 16.04 LTS.
1. To be able accessing and doing remote desktop, each computer must connect to the network (LAN) or Wi-fi network.
2. Check the IP address of Windows computer, see this previous post to know IP address. (This IP address will be used on the Ubuntu client to access the remote computer (windows). You can also use the computer name to access if the DNS service is active).
3. Allow Remote desktop access setting in the Windows. for example you can see this post to enable Windows remote desktop access,
4. After allowing the remote desktop access, then you have to set the Windows firewall to give the access for remote desktop protocol.
Example to set Windows firewall in Windows 8 or Windows 10.
In the search column, type/write or copy paste this words: Allow an app through Windows firewall, then you will see result on the best match, click it.
In the Allowed apps and features page, give a tick for Remote Desktop as shown in the figure below.

Next steps, on the Ubuntu for accessing.
5. Choose/click Search your computer icon. Type/write: Remmina, then you will see the Remmina Remote Desktop Client. Click on it to run the application.

6. Type the IP address of Windows computer (see step 2) and see the capture/figure below, click Connect.
7. Input the username and password of Windows user (user who has privilege for accessing remote desktop, the Administrator already has access for remote desktop without adding it to remote desktop user) .

8. You can also create profile first, to make easier when you will connect to the remote desktop.
Click New to make connection profile. Give a name for profile name, type IP address or computer name in server column, then username and password. Save it.

In this example I use Ubuntu 16.04 LTS.
One of the applications for Remote desktop Windows is Remmina Remote Desktop Client App.
By default, this remote App is already installed in Ubuntu 16.04 LTS.
1. To be able accessing and doing remote desktop, each computer must connect to the network (LAN) or Wi-fi network.
2. Check the IP address of Windows computer, see this previous post to know IP address. (This IP address will be used on the Ubuntu client to access the remote computer (windows). You can also use the computer name to access if the DNS service is active).
3. Allow Remote desktop access setting in the Windows. for example you can see this post to enable Windows remote desktop access,
4. After allowing the remote desktop access, then you have to set the Windows firewall to give the access for remote desktop protocol.
Example to set Windows firewall in Windows 8 or Windows 10.
In the search column, type/write or copy paste this words: Allow an app through Windows firewall, then you will see result on the best match, click it.
In the Allowed apps and features page, give a tick for Remote Desktop as shown in the figure below.

Next steps, on the Ubuntu for accessing.
5. Choose/click Search your computer icon. Type/write: Remmina, then you will see the Remmina Remote Desktop Client. Click on it to run the application.

6. Type the IP address of Windows computer (see step 2) and see the capture/figure below, click Connect.
7. Input the username and password of Windows user (user who has privilege for accessing remote desktop, the Administrator already has access for remote desktop without adding it to remote desktop user) .

8. You can also create profile first, to make easier when you will connect to the remote desktop.
Click New to make connection profile. Give a name for profile name, type IP address or computer name in server column, then username and password. Save it.
